
Here is the class Linda and I taught at Jill's (Cardinal Colours) Seaside Retreat last weekend.
There are now three versions of this layout, we made one together when designing called 'Island Hoppers' with photos of my girls on the Isles of Scilly back in 2000:

A second one I made for step by step instructions called 'Lady of Kent' which is the name of the boat I'm sitting on, way back in the 1982:

The third one was made by Linda, called 'Totally Tropical' which sums up these papers and the photos beautifully and shows pictures of her family in Barbados in 2005.

We have returned to reality, totally exhausted, but all had a brilliant time. Amongst other things Linda and I created was this layout (...not a scraplift in sight), for a class with 'Seaside' theme in mind. When we saw the advert for the Lauderdale range from Basic Grey, some time before it was released, we knew it was perfect for what we wanted to do and so designed this page before the papers were available. They are such fantastic colours and designs - we hope you agree.

A second one I made for step by step instructions called 'Lady of Kent' which is the name of the boat I'm sitting on, way back in the 1982:

The third one was made by Linda, called 'Totally Tropical' which sums up these papers and the photos beautifully and shows pictures of her family in Barbados in 2005.

Lauderdale Layout Class


 We are known as the ‘Inking Queens’, we inked the edge of everything before sticking down (but this is entirely optional)! We usually add thread to the buttons and tie a simple knot which is also optional.


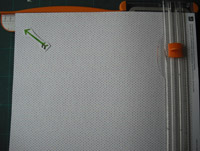 2. Cut ‘cutoffs’ paper to measure 11” x 11” and round the corners, this will be used tiny dotty side up.
  3. Round the corners of the dotty paper (optional).
 4. Stick ‘cutoffs’ dotty paper centrally over blue dots side of ‘spf’ frame, so you have a blue border of about 1/2” all round the dots. (Dot to Dot!)

5. Cut a piece of ‘clearwater’ paper 12”x5” making sure waves are horizontal.
 6. Trim this to 11” wide (1”x5”). Affix to page 2” up from bottom.
 7. Position photos on page and stick in place glue centres only to allow for tucking elements under later.
 8. Take remaining ‘spf’, cut out a selection of clouds, boat, hearts and any other elements you wish to use.
9. Cut large green blossom, (leaving a narrow pink border) from left side of floral side of ‘coastline’ paper. Attach with 3D foam pads to top right corner of layout, overlap the edges a little then trim.


 10. Cut a selection of flowers and leaves from the rest of floral side of ‘coastline’ paper, Leave a small pink border around each petal. Don’t worry if you can’t get whole images of the flowers you like, with a little clever positioning and lots of overlapping they will look great, and work well.


12. Add all three pointer stickers to this strip, staggering, overlapping and layering with 3D foam pads.
 13. Add Button to blunt end of the strip and stick the complete embellishment horizontally over the green blossom on top right of layout.
14. Here comes the fun bit! Arrange all the elements, including tags and buttons. When happy with the arrangement, stick in place with a selection of glues and 3D foam pads. Tuck some under and others overlapping the photograph. (Keep the acetate backing form the tags – we need this later.)


 13. Add some journaling to the tags.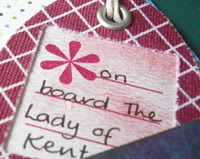

 Simply attach just the very bottom of the letters to the acetate. (If you want a curved shaped title, just cut the acetate to shape first.) Arrange how you want them.
 Hold letters over the layout without touching the papers, to see if they fit.
 Pull away the acetate when happy with the placement.
Cardinal Colours Retreat September 2011
Kit Content:

4 double sided sheets of 12”x 12” Basic Grey - Lauderdale papers - (SPF, Coastline, Cut Offs and Clearwater)
6 Basic Grey - Lauderdale buttons
1 - 12”x12” sheet Basic Grey – Lauderdale element stickers
1 - 12”x12” sheet Basic Grey – Lauderdale alpha stickers
1 pack of 4 Basic Grey – Lauderdale canvas tags
Selection of DMC stranded cotton threads.

We have included our sketch – that’s what we do at Scrapology! You may like to use it for another layout too. Please link or email any layouts you make using this sketch, it would be great to share them on the blog.
In addition you will need 2 - 6”x4” (or smaller) photos (one landscape and one portrait)
Basic tools including: Inks, corner rounder, Paper trimmer, Adhesives for paper, 3D foam pads, Pen for journaling & Needle for buttons.
Instructions
We are known as the ‘Inking Queens’, we inked the edge of everything before sticking down (but this is entirely optional)! We usually add thread to the buttons and tie a simple knot which is also optional.1. To make your base, take the ‘sfp’ paper remove name strip, gut paper so you have a 12” x 12” frame 1” in from edge all round. This will be used blue, large dots side up.
2. Cut ‘cutoffs’ paper to measure 11” x 11” and round the corners, this will be used tiny dotty side up. 3. Round the corners of the dotty paper (optional). 
5. Cut a piece of ‘clearwater’ paper 12”x5” making sure waves are horizontal.


9. Cut large green blossom, (leaving a narrow pink border) from left side of floral side of ‘coastline’ paper. Attach with 3D foam pads to top right corner of layout, overlap the edges a little then trim.

11. Use a strip of the denim side of ‘cutoffs’ paper, trim to ¾” x 6” and cut an inverted ‘V’ in one end.
12. Add all three pointer stickers to this strip, staggering, overlapping and layering with 3D foam pads.
14. Here comes the fun bit! Arrange all the elements, including tags and buttons. When happy with the arrangement, stick in place with a selection of glues and 3D foam pads. Tuck some under and others overlapping the photograph. (Keep the acetate backing form the tags – we need this later.)
14. Create your title to the top left of the layout using the alpha sheet.
Top tip – How often have you found you have run out of room for the last letter when placing a title, or it’s not straight whe
n you look at it later, but it’s firmly attached and won’t move without tearing the papers? Try making use of the cellophane wrappers or use the acetate from inside the packs to help with positioning.
n you look at it later, but it’s firmly attached and won’t move without tearing the papers? Try making use of the cellophane wrappers or use the acetate from inside the packs to help with positioning.
Now your layout is complete.
Thanks for taking the time to read this post and although the kits for this class are sold out, Jill has many of the individual elements and papers in the store, they may not be on her website just yet but you could email to see what she has available jill@cardinalcolours.co.uk or check out Cardinal Colours web page.
BLOG CANDY
Comment on Scrapology for your chance to win one of the original kits for this layout.

Closing date midnight 26th September 2011
Good Luck!
Here is the layout made by Sue (Mini Owner) during the class, see her blog for more of her retreat creations.

Comment on Scrapology for your chance to win one of the original kits for this layout.

Good Luck!
Here is the layout made by Sue (Mini Owner) during the class, see her blog for more of her retreat creations.
Please add your creations, by commenting here or on Scrapology with a link or send us an email with an image.


